Articles > DIY & Crafting for Punks
The punk subculture has made a significant impact on fashion, particularly through its emphasis on DIY and customization. Punks reject mainstream fashion and instead express their individuality through personalized clothing and accessories. DIY techniques, such as patchwork, studding, and distressing, are key elements of punk fashion, allowing individuals to create unique and expressive outfits. The use of unconventional materials and items, such as safety pins, chains, and leather, further adds to the rebellious and non-conformist nature of punk fashion.
Punk fashion is a reflection of the subculture's rebellious spirit, encouraging individuals to break free from societal norms and express themselves through their clothing. The focus on self-expression and individuality has resulted in a diverse and versatile fashion style that continues to influence mainstream fashion to this day. Overall, the punk subculture has left a lasting impact on fashion by promoting DIY, customization, and a focus on self-expression.
DIY punk accessories have become a staple within the punk subculture, allowing individuals to express their rebellious and nonconformist attitudes through unique and personalized creations. From studded belts and spiked wristbands to custom-painted jackets and DIY patches, these accessories offer a means of self-expression and creativity for those who identify with the punk ethos. Whether it's for a concert, underground show, or simply as a way to stand out from the crowd, DIY punk accessories are a way for individuals to make a statement and showcase their individuality. This DIY approach also allows for a sense of empowerment and independence, as individuals take control of their own style and reject mainstream consumerism. Furthermore, DIY punk accessories often carry a sense of nostalgia and authenticity, harkening back to the grassroots origins of the punk movement and its emphasis on self-made, anti-establishment ethos. Overall, DIY punk accessories provide a means for individuals to embrace their punk identity and showcase their unique style.
Embracing rebellion and individuality can be a positive force for personal growth and societal change. Cultural movements like punk, grunge, and hip-hop music scenes have embraced a rebellious spirit, challenging societal norms and celebrating individuality.
By rejecting mainstream conventions and embracing their own unique identities, these movements have sparked innovation in music, fashion, and art. They have pushed boundaries and opened up new possibilities for expression, paving the way for fresh ideas and creativity.
Embracing a rebellious spirit can also lead to personal growth, as individuals break free from societal expectations and discover their true selves. By being unapologetically authentic, they inspire others to do the same, creating a culture of acceptance and diversity.
Furthermore, this embrace of individuality has the power to dismantle societal norms and challenge the status quo. It opens up conversations about what it means to be different and pushes for a more inclusive and open-minded society.
In conclusion, embracing rebellion and individuality can lead to innovation, personal growth, and the dismantling of societal norms, creating a more vibrant and diverse cultural landscape.
To customize your own punk fashion style, start by mixing and matching different elements to create a unique look. Add studs or spikes to clothing, such as jackets, pants, or shoes, to give them an edgy appearance. Repurpose found objects, like chains or safety pins, to create unique accessories like chokers, bracelets, or belts.
Upcycle old clothes by adding patches or screen printing designs onto fabric to make them stand out. Experiment with unconventional materials such as leather, mesh, or fishnet to add a distinctive touch to your outfit. Sew patches onto clothing or bags to showcase your personal style.
To truly express your individuality, think outside the box and incorporate unexpected items into your punk fashion look. Consider using unconventional materials like duct tape, wire, or industrial hardware to add a bold and unconventional touch to your attire.
By customizing and mixing and matching different punk elements, you can create a unique and expressive look that truly represents your personal style.
Creating homemade accessories is a cost-effective and fun way to add unique pieces to your collection. To make hair accessories, start by cutting a fabric strip and sewing or gluing it into a bow shape. Add a hair clip or headband to secure it. For jewelry, use beads and string to create your own necklaces and bracelets. You can also repurpose found objects, such as buttons or old keys, for a creative twist. Handbags can be made from fabric remnants or repurposed materials, such as old jeans or sweaters.
To make a cost-effective and creative hair accessory, gather materials like fabric scraps, beads, and a headband or hair clip. Use the fabric to create a bow or flower embellishment, and add beads or found objects for extra flair. For jewelry, consider using beads and wire to make earrings or necklaces. Get creative with using unconventional materials, like old fabric or recycled items, to keep costs low.
In summary, homemade accessories can be easily made using fabric, beads, and found objects. With cost-effective techniques and creative alternatives, you can create personalized accessories that stand out.
When it comes to choosing the right materials for a project, it is important to consider factors such as durability, cost, environmental impact, and suitability for the intended purpose. Making the right choice can impact the overall success and longevity of the project, so careful consideration and research are essential. Whether it's for a construction project, a craft or DIY project, or any other endeavor, selecting the appropriate materials is crucial for achieving the desired results. In the following sections, we will discuss some key considerations to keep in mind when choosing the right materials for your next project.
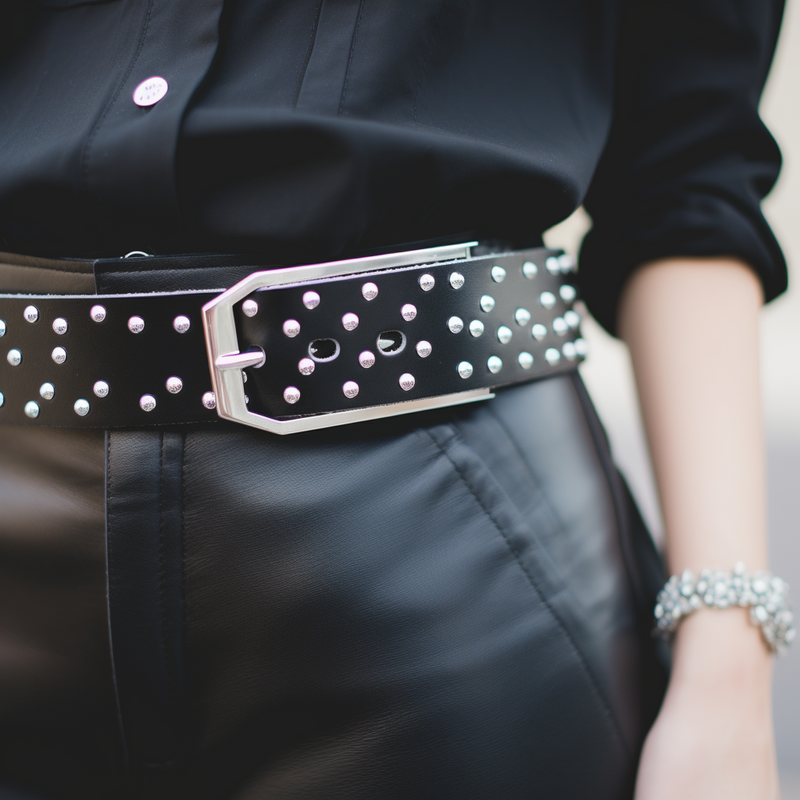
Studded belts are available in a variety of materials, including leather, faux leather, and fabric options. Leather studded belts provide a classic and durable look, while faux leather and fabric options offer a more affordable and versatile alternative.
When it comes to designs and styles, studded belts come in various options such as double-pronged, single-pronged, and reversible belts. Double-pronged belts offer extra stability and a rugged look, while single-pronged belts provide a more streamlined and traditional style. Reversible belts are versatile and offer two looks in one, making them a practical choice for mixing and matching with different outfits.
In terms of sizes and colors, studded belts are available in a wide range to suit individual preferences. From small to plus sizes and traditional black and brown to bold colors and metallic finishes, there is a studded belt for every style. Additionally, some studded belts feature unique buckle types and embellishments, adding extra flair to the overall design.
Whether you're looking for a classic leather studded belt or a trendy fabric option, the market offers a diverse range of designs, colors, and styles to choose from.
When selecting a leather belt for customization, it's important to consider the material, size, color, and compatibility with chosen customization techniques. Firstly, determine if you want a genuine leather belt or a faux leather one. Genuine leather is durable and will age beautifully, while faux leather is a more affordable and vegan-friendly option.
Next, consider the size and color of the belt. Make sure the length and width are suitable for the wearer, and the color complements the customization design. Ensure the belt is compatible with the chosen customization techniques, such as embossing, painting, or adding studs. The width and thickness of the belt should be considered for ease of attaching embellishments.
Ultimately, a suitable leather belt for customization will be one that is made of the desired material, comes in the right size and color, and is compatible with the customization techniques being used. Taking these factors into consideration will help ensure a successful and personalized result.
Studs are a staple in punk fashion and come in various types, each with its own unique characteristics.
The most common materials for studs are metal, such as brass or nickel, and they can be found in shapes like spikes, cones, or simple circular designs. Studs also vary in size, ranging from small and subtle to large and attention-grabbing. They come in an array of colors, including silver, gold, black, and even brightly colored enamel.
Pyramid studs are often used to create a classic punk look, usually adorning leather jackets, belts, and boots. Cone studs, on the other hand, are popular for embellishing denim, vests, and accessories like handbags and wristbands. Spike studs add a more aggressive edge and are commonly found on collars, cuffs, and chokers.
Studs can be used to achieve different punk looks, from the rebellious and edgy to the more glam and polished. Whether it's adding a touch of fierceness to a leather jacket or creating a bold statement on a pair of combat boots, studs are a versatile embellishment in punk fashion.
If you're looking to add some edge to your wardrobe, a studded belt is the perfect accessory for a DIY project. With just a few tools and materials, you can create a custom studded belt that reflects your personal style and adds some extra flair to any outfit. So, gather your supplies, and let's get started on creating your very own studded belt.
Before starting the upcoming project, it is essential to gather the necessary tools to ensure a smooth and efficient process. The essential tools required for this project include a pair of pliers, a pair of scissors, and a sewing machine if available. The pair of pliers will be useful for gripping, twisting, and cutting wires or other materials as needed. The pair of scissors will be necessary for cutting fabric, thread, or any other materials used in the project. If a sewing machine is available, it will greatly expedite the process of sewing and assembling the project. It is important to have these tools on hand before starting the project to avoid any delays or interruptions. By ensuring that these essential tools are readily available, the project preparation will be more organized and productive.
to customize leather products.
Start by securely placing the leather on a hard surface. Use the leather punch to make precise holes as needed, ensuring that the leather is secure and does not move during the process. The leather punch allows you to create holes for adding hardware, such as clasps or studs, or for decorative purposes.
After punching the holes, gently tap the hammer to secure any hardware onto the leather. This could include attaching snaps, rivets, or eyelets to the leather. Use a light touch with the hammer to avoid damaging the leather while still ensuring that the hardware is firmly attached.
Additionally, the hammer can be used to add decorative elements to the leather, such as embossing or stamping designs onto the surface. Be sure to use the appropriate tools and techniques for your desired customization.
By using the leather punch and hammer, you can easily and securely customize leather products to your liking, adding both functional and decorative elements to your designs.
Whether you're looking to add a punk edge to your outfit or simply want to customize your accessories, making your own studded belt is a fun and simple DIY project. In this step-by-step guide, we'll walk you through the process of creating your very own studded belt. From gathering the necessary materials to adding the studs and customizing the design, you'll learn the techniques needed to make a stylish and unique belt that reflects your personal style. So, grab your materials and get ready to unleash your creativity as we dive into the world of studded belt making.
To measure and cut a leather or faux leather belt to the desired length, follow these steps. First, decide on the desired length of the belt and take into account the size of the belt buckle. Use a ruler to measure the length from the end of the buckle to the desired position for the new hole or tip of the belt. Keep in mind how the buckle will affect the overall length of the belt.
Once you have measured the belt to the desired length, use a pair of sharp scissors or a knife to carefully cut the belt to size. If you are using scissors, make sure they are strong enough to cut through the leather or faux leather. If you are using a knife, place a cutting mat or a piece of cardboard underneath the belt to protect the surface below.
After cutting the belt to size, you may need to add a new hole to the belt, depending on the style of the buckle and the closure. Finally, smooth out any rough edges from the cut with a piece of sandpaper. By following these steps, you can easily measure and cut a leather or faux leather belt to the desired length.
To mark stud placement on the belt, start by positioning the belt on a flat surface and decide where you want the studs to be placed. Use a ruler to measure and mark the spots where the studs will go, ensuring they are evenly spaced out for a balanced look. Make sure to take precise measurements using the ruler for accuracy. If you have additional embellishments you want to add, make note of their placement as well. Use the ruler to ensure that the studs and any other embellishments are placed exactly where you want them to be. Double-check your measurements and markings before proceeding with adding the studs and embellishments to the belt. This process will help you create a well-designed belt with evenly spaced studs and any additional embellishments in the desired placements.
 Author: Dean Dallas