Articles > DIY & Crafting for Punks
Punk rock emerged in the mid-1970s as a response to the perceived stagnation of mainstream music. Influenced by bands like The Stooges, MC5, and the New York Dolls, punk rock became a voice for the disillusioned youth. The movement embraced a DIY aesthetic, with many bands self-releasing their music and organizing their own shows.
The punk subculture quickly developed, characterized by its anti-authoritarian and anti-conformist attitudes. The fashion associated with punk, including ripped clothing, leather jackets, and unconventional hairstyles, became a symbol of rebellion and nonconformity.
Punk rock spread worldwide, with a second wave emerging in the late 1970s particularly in the UK with bands like The Sex Pistols and The Clash. This era saw the development of different regional variations, such as hardcore punk in the US.
Punk rock also had a significant impact on various music genres, influencing movements like post-punk, new wave, and alternative rock. The DIY ethos and anti-establishment message of punk rock continue to resonate with youth culture, making it a timeless and influential force in the music industry.
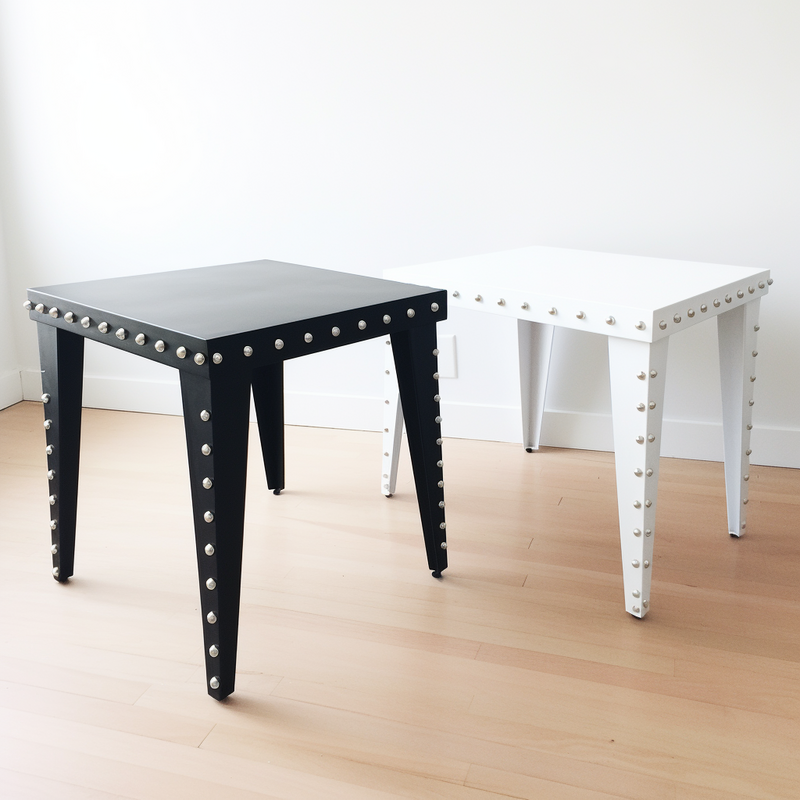
If you're looking to add a touch of DIY punk style to your home decor, studded table legs are a great way to go. This edgy and rebellious look can be achieved with just a few simple materials and some creativity. Whether you're a fan of punk rock or just want to add some unique flair to your living space, creating your own studded table legs is a fun and rewarding project. In this article, we'll show you how to make your own studded table legs to give your furniture a punk-inspired makeover. So grab your supplies and get ready to rock out with some DIY home decor!
To achieve the iconic punk edge in your venue, studded table legs are the perfect addition to punk-inspired decor. Here's how you can create them by repurposing materials from thrift and dollar stores.
Materials needed:
- Table legs (can be sourced from thrift stores)
- Metal studs or spikes (found at dollar stores or craft stores)
- Hot glue gun or strong adhesive
- Black paint or spray paint
Steps:
1. Find old table legs at a thrift store. Look for ones with interesting shapes or designs to add character to the studded legs.
2. Purchase metal studs or spikes from a dollar store or craft store. These can be in various shapes and sizes to customize the look.
3. Use a hot glue gun or strong adhesive to attach the metal studs onto the table legs. Arrange them in a pattern or design that suits your punk-inspired decor.
4. Once the studs are securely attached, you can paint the table legs black or another punk-inspired color to give them a cohesive look.
By repurposing materials and creatively adding studded table legs to your decor, you can achieve an iconic punk edge in your venue. These unique and edgy accents will definitely stand out in your punk paradise.
Materials needed for the project include:
- Wood (specific measurements mentioned in background information)
- Wood screws
- Wood glue
- Sandpaper
Tools needed for the project:
- Saw (specific type mentioned in background information)
- Drill
- Screwdriver
- Clamps
- Measuring tape
- Pencil
Supplies needed for the project:
- Protective eyewear
- Dust mask
- Work gloves
In order to successfully complete the project, ensure that all materials, tools, and supplies are readily available. The wood should be of the specified measurements and the saw should be the recommended type for optimal results. Be sure to use the appropriate safety gear, such as protective eyewear, a dust mask, and work gloves, when handling the materials and using the tools. Once all materials, tools, and supplies are gathered, follow the steps outlined in the project instructions to complete the project successfully.
When embarking on a project to build or assemble a table, one of the first steps is to prepare the table legs. This crucial component provides the stability and support for the entire structure. Whether you are working with pre-fabricated legs or crafting your own, it is important to ensure they are all uniform in size, shape, and strength. Properly preparing the table legs will set the foundation for a sturdy and balanced finished product. This process involves taking precise measurements, cutting the legs to the desired length, and making sure they are sanded and finished to your preference. Additionally, if you are creating your own table legs, you will want to consider the type of wood and any additional decorative elements you may want to include. Taking the time to carefully prepare the table legs is the first step in creating a beautiful and functional table that will be enjoyed for years to come.
When it comes to choosing the right table legs for your project, there are various options to consider. Some of the types of table legs available include hairpin, tapered, straight, turned, and folding. Hairpin legs are a popular choice for a modern and minimalist look, while tapered legs are more traditional and provide stability. Straight legs are simple and versatile, turned legs have decorative details and add a classic touch, and folding legs are convenient for tables that need to be stored or transported easily.
When selecting table legs, it's important to consider factors such as the height of the legs to ensure they are suitable for the intended use. The style should also complement the overall design of the table. Materials like wood, metal, or plastic can affect the durability and appearance of the legs. Additionally, the installation method should be taken into account, whether it's screwing the legs into the table or using brackets for attachment.
By considering these factors, you can choose the right table legs that not only provide the necessary support but also enhance the aesthetic appeal of your project.
Sanding the table legs is an important step to create a smooth surface for better adhesion of the primer and paint. Start by using a medium-grit sandpaper to gently sand the legs, working in the direction of the wood grain to avoid creating any scratches. This will help to remove any rough spots or uneven areas on the surface of the wood. After sanding, wipe down the legs with a clean cloth to remove any dust or debris.
Once the table legs are smooth and free of dust, it's time to apply a coat of primer. The primer is essential for ensuring better adhesion of the paint to the wood surface. It helps to create a uniform base and improves the durability and longevity of the paint finish. Make sure to choose a primer that is suitable for the type of paint you will be using.
By following these steps, you can ensure that the table legs are properly prepared for painting. Sanding and priming the legs will result in a smooth and even surface, allowing the paint to adhere better and creating a professional-looking finish.
When it comes to adding a touch of punk flair to your furniture, studs and rivets can make a bold statement. In particular, adding these edgy embellishments to your table legs can instantly transform a plain piece of furniture into a powerful statement piece. From rocker chic to industrial vibes, studs and rivets offer a versatile way to inject personality and style into your home decor. Whether you're upcycling an old table or customizing a new one, the right studs and rivets can take your furniture design to the next level. Explore various styles and sizes to find the perfect way to add a punk-inspired touch to your table legs and create a unique look that reflects your personality and aesthetic.
There are various types and sizes of studs and rivets available for different applications, including cone studs, pyramid studs, flat studs, and tubular rivets. Cone studs are often used for leather materials, providing a sleek and modern look. Pyramid studs, on the other hand, are best suited for denim as they offer a more edgy and punk rock vibe. Flat studs are versatile and can be used on a variety of materials, including leather, denim, and metal. Tubular rivets, which come in various sizes, are commonly used in heavy-duty applications such as on metal materials, providing a strong and secure fastening.
In terms of sizes, smaller studs and rivets are better for delicate materials like leather, while larger sizes are more suitable for thicker or heavier materials like denim or metal. The choice of stud or rivet also depends on the specific function and design desired, ensuring that the final application is both functional and aesthetically pleasing. Whether it's for adding embellishments to clothing or creating durable fastenings for metalwork, there are various types and sizes of studs and rivets to suit different materials and applications.
To mark the placement of studs on the table legs, start by ensuring that the stud finder is set to the correct mode according to the material of the table legs, whether it is wood or metal. Once the stud finder is set, place it against the table leg and begin scanning for studs. When the stud finder detects a stud, mark its placement on the table leg with a pencil or a piece of tape. Be sure to mark the exact location of the stud to ensure accuracy. Repeat this process for each table leg to mark all the stud placements. This will provide a guide for where to drive screws and ensure that the table legs are securely attached to the studs in the wall. Using a stud finder to mark the placement of studs on the table legs is a quick and easy way to ensure the proper installation and stability of the table.
When working on a DIY furniture project, attaching studs and rivets to the table legs can add a unique and industrial touch to the final piece. By mastering the technique of adding these details, you can elevate the overall look of the table and create a more custom and personalized feel. This process requires precision and careful attention to detail, so it's important to follow the steps closely to ensure that the studs and rivets are securely attached. With the right tools and a bit of patience, you can achieve a professional-looking result that will make your table stand out.
When attaching 9mm studs and rivets to leather, you will need a few essential tools to ensure a successful and secure application. Firstly, you will need a leather punch to create the necessary holes in the leather for the studs and rivets. Be sure to use the appropriate size punch to match the 9mm studs and rivets mentioned in the advertisement.
Next, you will need setting pliers to securely fasten the studs and rivets in place. Again, make sure that the setting pliers are the correct size for the 9mm studs and rivets.
Additionally, you will need an anvil or a hard surface to provide a sturdy base for setting the studs and rivets. The anvil will help ensure that the studs and rivets are properly and securely attached to the leather.
Finally, you will need a hammer to firmly set the studs and rivets in place. When using the hammer, be sure to work on a stable and sturdy surface to avoid damaging your work or injuring yourself.
By using the appropriate tools including a leather punch, setting pliers, anvil, and hammer, you can confidently attach 9mm studs and rivets to your leather projects with precision and security.
1. Start by selecting the correct size and type of studs for the material you are attaching to. Ensure the studs are appropriate for the weight and type of load they will bear.
2. Use a drill to create pilot holes in the material. The size of the pilot hole should be slightly smaller than the diameter of the studs. This will help prevent the material from splitting and make it easier to screw in the studs.
3. Carefully screw the studs into the pilot holes using a screwdriver or drill. Use a level to ensure the studs are being attached at the correct angle and a measuring tape to ensure they are evenly spaced.
4. Once all the studs are secured in place, double-check the attachment's stability by giving it a gentle tug. If it feels loose or wobbly, recheck the pilot holes and the placement of the studs. Make any necessary adjustments to ensure a secure attachment.
By following these steps, you can securely attach studs to the material, ensuring a strong and stable attachment for your project.
When it comes to adding a unique touch to your studded table legs, there are numerous alternative techniques that can help you achieve a one-of-a-kind look for your furniture. Whether it's using unconventional materials or experimenting with different design styles, there are plenty of creative ways to make your studded table legs stand out. In this article, we will explore some alternative techniques for adding a unique flair to your table legs, from using different types of studs and finishes to incorporating unexpected elements for a truly personalized touch. These techniques can help you create a statement piece that reflects your individual style and personality while elevating the overall look of your space. Whether you're a DIY enthusiast or a furniture designer looking to push the boundaries of conventional design, these alternative techniques can inspire you to reimagine the possibilities for your studded table legs.
Experimenting with different patterns and arrangements of studs and rivets can add a unique and eye-catching element to your fabric or leather projects. Lay out various combinations on a piece of fabric or leather and test different placements and distances between the studs to see which design you prefer. Consider using different sizes and shapes to create an interesting and visually appealing pattern.
You can try arranging the studs in a straight line for a more uniform look, or experiment with placing them in a scattered or random pattern for a more eclectic feel. Mixing different shapes and sizes of studs and rivets can also create a dynamic and visually stimulating design.
By experimenting with different patterns and arrangements, you can create a custom and one-of-a-kind piece that reflects your personal style and creativity. Whether you are embellishing a leather jacket or creating a fabric accessory, the possibilities are endless when it comes to designing with studs and rivets. So, take the time to experiment and find the perfect arrangement that best suits your project.
 Author: Sarah Howard